Introduction#
Human-humanoid-tools (hhtools) is RoboParty Lab's open-source motion data toolchain for humanoid robots. In about 30 seconds, it retargets human motion (motion capture data, public datasets, monocular video) or another robot's motion onto any URDF humanoid robot. It also provides batch processing and dataset analysis.
The output is a joint trajectory for the target robot (CSV or PKL), which can be used as motion data for training control policies such as MimicLite and UFO (format conversion may be needed when plugging into each training framework). Retargeting a single complex motion clip takes about 30 seconds.
Resources:
1. Overview#
This section covers what hhtools does, the ways to use it, and environment setup. By the end of this section, you will be able to open hhtools in a browser or the desktop app, and use the command line to check that each component is ready.
1.1 What hhtools Can Do#
| Workflow | What it does | See |
|---|---|---|
| Motion to Robot | Retargets human motion to a target robot; supports motion only, human–object interaction and terrain scenes | Section 2 |
| Robot to Robot | Transfers existing robot trajectories to another robot | Section 3 |
| Video to Motion | Estimates human motion from monocular video and saves it to the motion library | Section 4 |
| Batch | Runs the three workflows above in batches, or processes whole datasets with offline scripts | Section 5 |
| Analysis | Scans a motion dataset, computes metrics, tags and clusters clips, and recommends a training subset | Section 6 |
1.2 Ways to Use hhtools#
hhtools can be used in four ways. They share the same motion, robot and retargeting core, so you can pick whichever fits your scenario:
| Mode | Best for | How to start |
|---|---|---|
| WebUI | Visualization, calibration and interactive retargeting in the browser | uv run hhtools web |
| Desktop GUI | Installing and using it directly, without setting up a Python environment | Application menu, or hhtools-desktop |
| CLI | Servers, SSH, batch processing and automation | uv run hhtools ... |
| Agent (JSON CLI / MCP) | Letting scripts or AI agents call retargeting and batch processing | uv run hhtools agent ... / hhtools-mcp |
The WebUI and the desktop GUI share the same interface: the desktop GUI is an Electron app that starts the hhtools Python service locally and then loads the same page. Your data always stays on your machine.
1.3 System Requirements#
| Item | Requirement |
|---|---|
| Python | 3.12 or later |
| Operating system | Linux, Windows; macOS is supported only for the Apple Silicon desktop app |
| GPU | On Linux and Windows, Newton IK retargeting is accelerated with an NVIDIA GPU (CUDA 12); macOS uses the CPU |
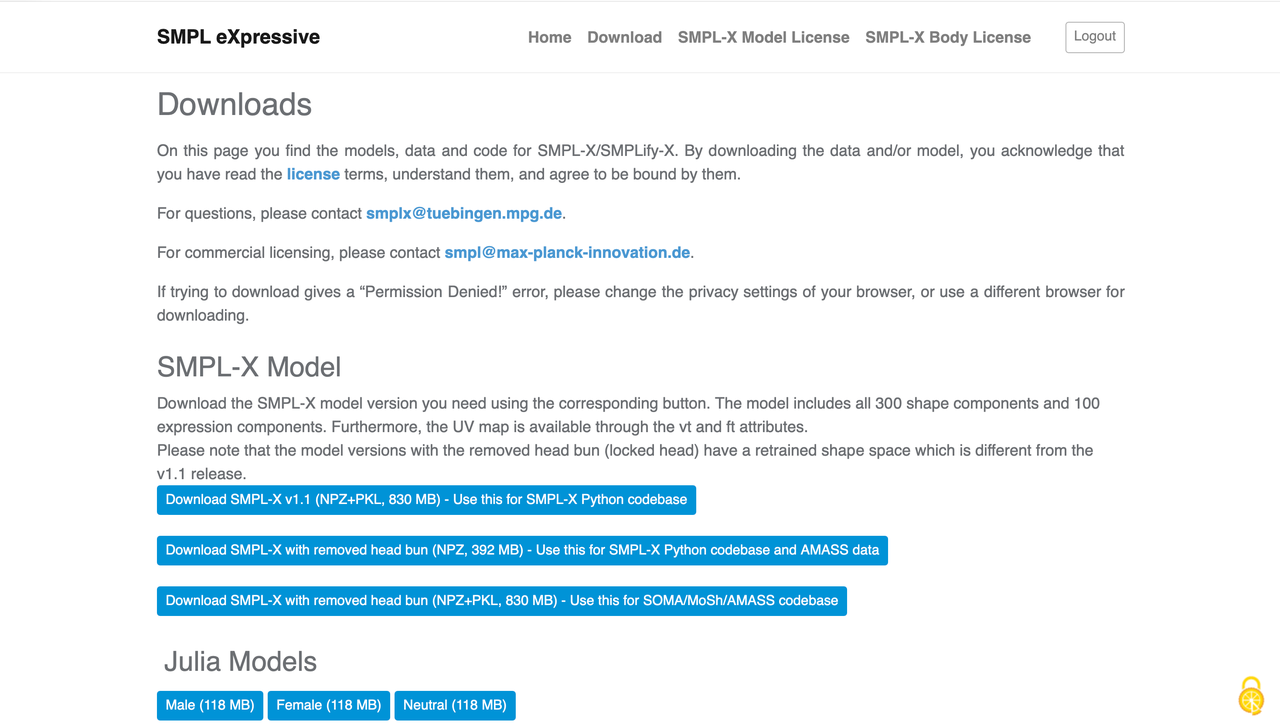
| Body model weights | Required for SMPL / SMPL-H / SMPL-X family motions; download them yourself from the MPI websites (non-commercial research license) |
| GVHMR | Needed only for Video to Motion; install a CUDA-capable GVHMR environment separately |
1.4 Install from Source#
We recommend managing the environment with uv. Install uv first, then clone the repository:
git clone https://github.com/Roboparty/human-humanoid-tools.git
cd human-humanoid-tools
# Only needed if Python 3.12+ is not installed on your machine:
uv python install 3.12
Install all features (formats, robots, retargeting, WebUI, Agent / MCP):
uv sync --locked --extra all
uv run hhtools --help
If you only need some of the features, choose extras as needed:
| Install command | Includes |
|---|---|
uv sync --locked |
Core CLI (format conversion, dataset import) |
uv sync --locked --extra web |
WebUI preview (with SMPL, MuJoCo, OSQP) |
uv sync --locked --extra web --extra retarget |
WebUI + Newton IK retargeting |
uv sync --locked --extra mcp |
Standalone local MCP server |
uv sync --locked --extra all |
All features |
If a dependency is missing, the launcher lists the missing packages and the commands to fix it.
Note
allinstalls the Python integration libraries only. It does not include GVHMR or the SMPL-family model weights; you need to prepare these yourself.
1.5 Prepare Robots and Body Models#
Install the built-in robots. hhtools provides 7 curated robots, downloaded from pinned versions of their upstream repositories:
# Install all 7 to ~/.config/hhtools/robots
uv run python scripts/install_builtin_robots.py
# Install only one of them
uv run python scripts/install_builtin_robots.py --only roboto_origin| Preset name | Robot | DoF |
|---|---|---|
roboto_01 |
ROBOTO 01 (RP1) | 28 |
g1_29dof |
Unitree G1 | 29 |
roboto_origin |
ROBOTO_ORIGIN (RPO) | 23 |
agibot_x2_ultra |
AgiBot X2 | 31 |
asimov_1 |
Asimov 1 | 23 |
fourier_gr2 |
Fourier GR-2 | 29 |
berkeley_humanoid_lite |
Berkeley Humanoid Lite | 22 |
Each robot keeps its upstream license and a checksummed provenance record. Other robots can be imported in the WebUI (see Section 2.2).
Prepare the body model weights. Register and download from the SMPL, SMPL+H and SMPL-X websites, then place the files in the following directories:
configs/body_models/
├── smpl/     SMPL_NEUTRAL.npz, etc.
├── smplh/    SMPLH_NEUTRAL.npz, etc.
└── smplx/    SMPLX_NEUTRAL.npz, etc.
hhtools looks in this directory first, then in ~/.cache/hhtools/body_models/; you can also point it to another location with the HHTOOLS_BODY_MODELS environment variable. Without the weights, SMPL-family motions can still be loaded and played back as a simplified skeleton, but without a real body mesh or accurate joint positions. (Note: this cannot be installed on Mac.)
Check the environment. Run the following command to check whether the WebUI, robots, retargeting, MCP, body models and GVHMR are ready. It only runs checks and does not start any task:
uv run hhtools doctor1.6 Launch the WebUI#
uv run hhtools webOpen http://127.0.0.1:8009 in your browser.
Common launch options:
| Option | Purpose | Default |
|---|---|---|
--source / -s |
Data root scanned by the motion library | assets/motions |
--save-dir |
Persistent NPZ cache directory | assets/save_npz |
--cache |
Per-session cache directory | Temporary directory |
--host / --port |
Listen address and port | 127.0.0.1 / 8009 |
--max-running-jobs / --max-queued-jobs |
Concurrency and queue limits for background jobs (see Section 5.3) | 0 (unlimited) |
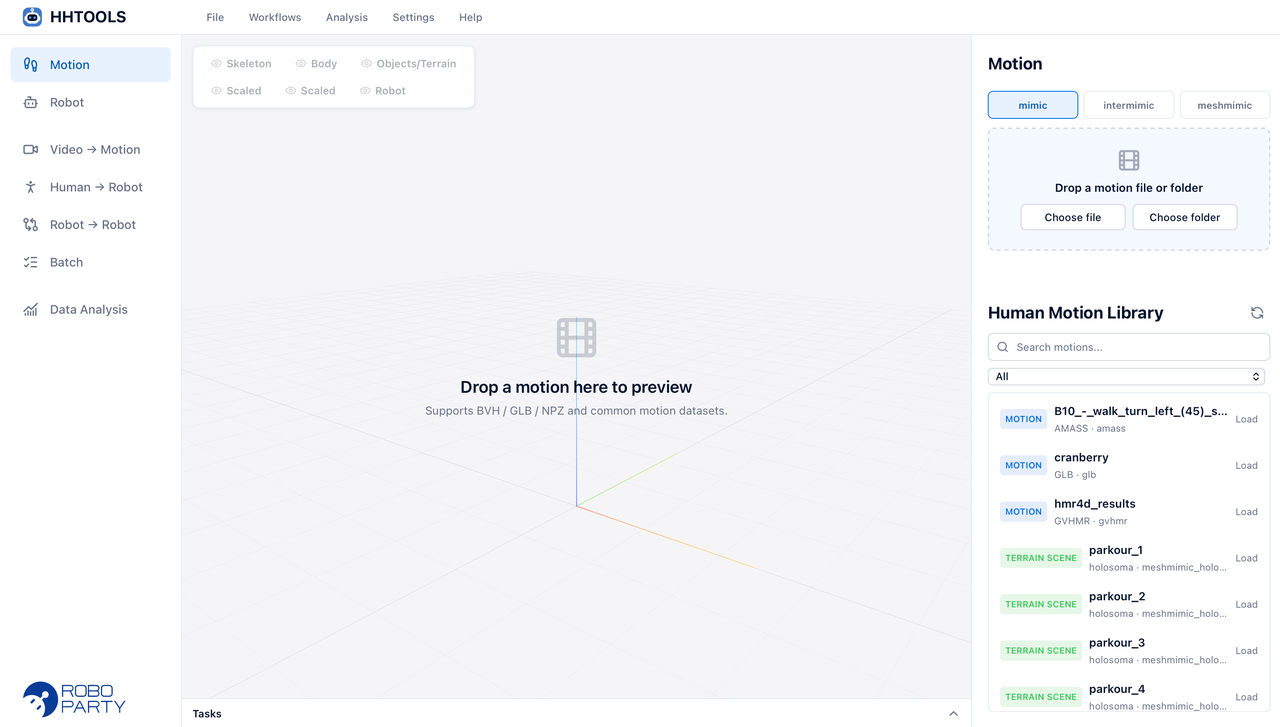
Interface layout. The left navigation has three groups:
| Group | Pages | Purpose |
|---|---|---|
| Assets | Motion, Robot | Browse, import and manage the motion library and the robot library |
| Workflows | Video → Motion, Human → Robot, Robot → Robot, Batch | The workflows in Sections 2–5 |
| Analysis | Data Analysis | Section 6 |
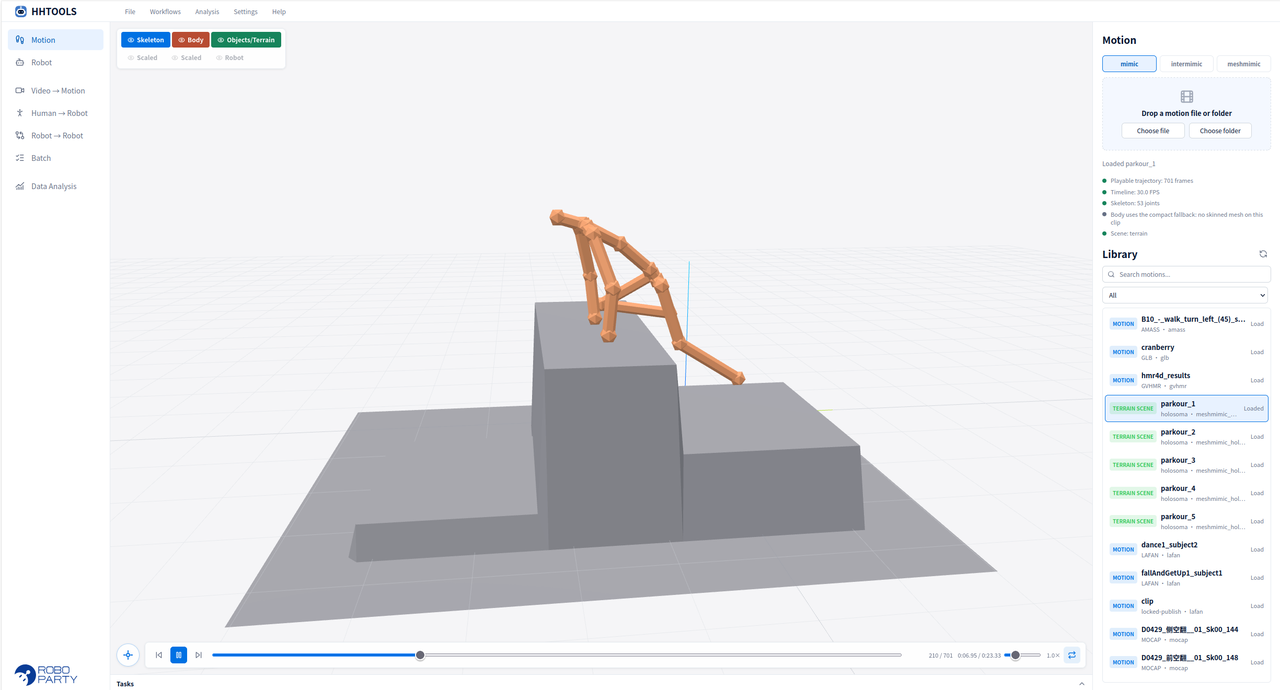
The stage in the middle displays motions and robots with three.js, and the right side holds the control panel for the current workflow. All background jobs (loading, retargeting, batch processing, analysis) appear in the task drawer, where you can export results once they finish.
Workspace Settings. Here you can switch the interface language (Simplified Chinese / English; follows the system by default), show or hide the left and right panels, change the motion library directory, check whether GVHMR is ready, force re-analysis, and adjust background-job scheduling.
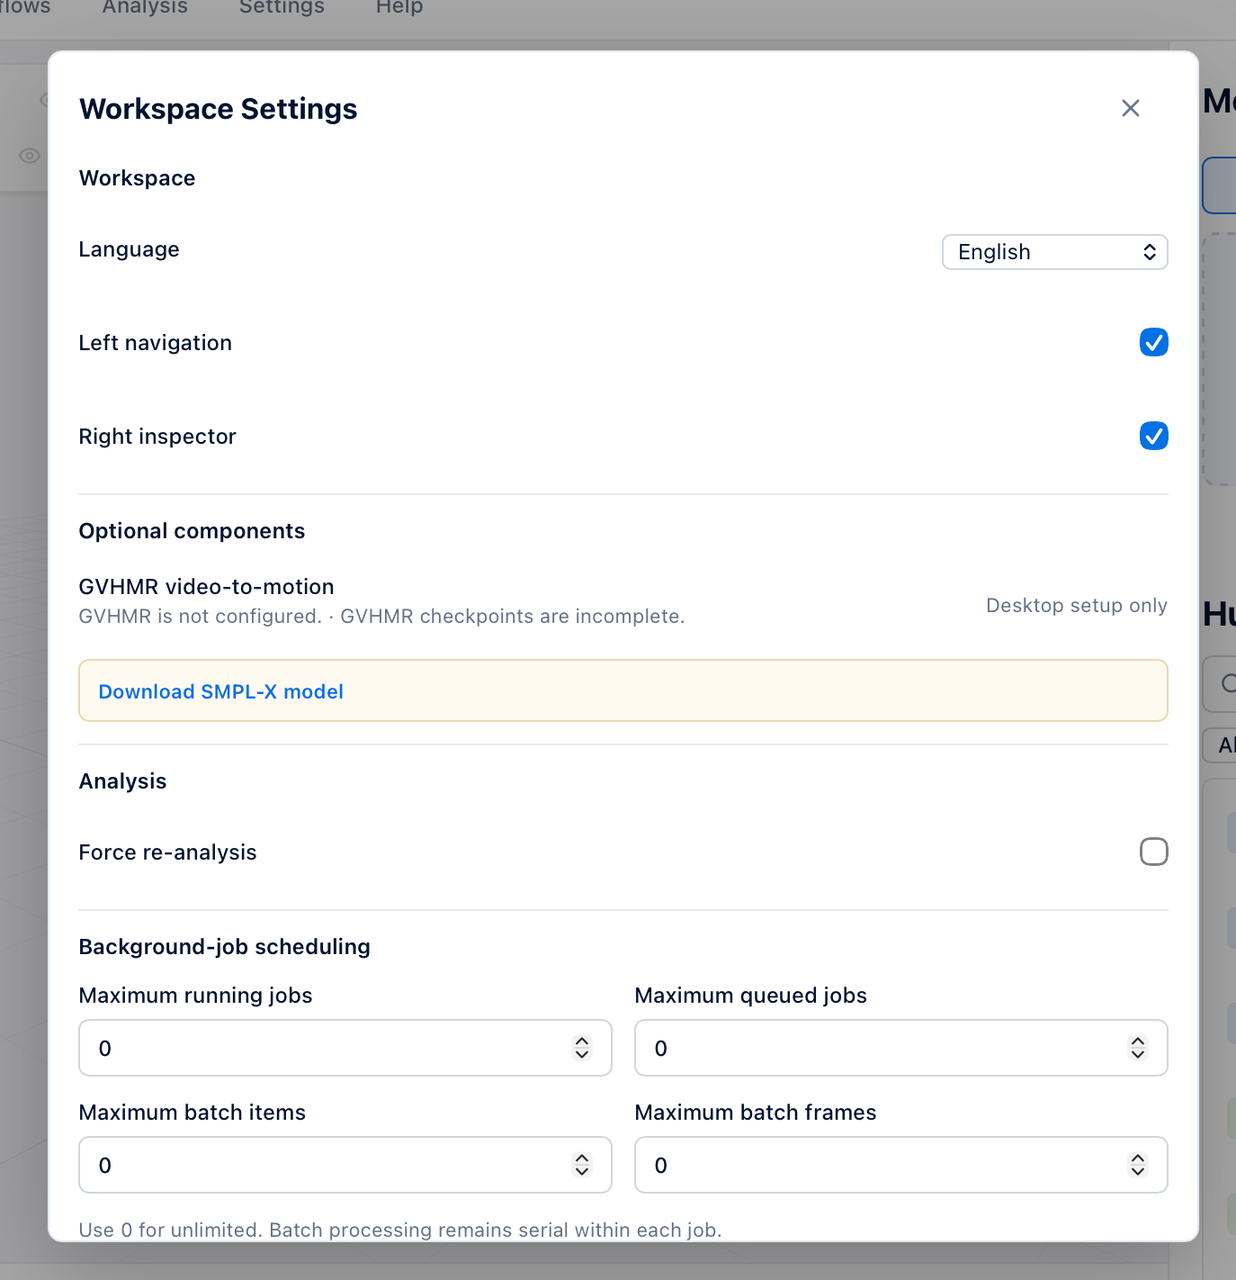
Note When running on a remote server, access the WebUI through SSH local port forwarding. Until authentication for remote administration is implemented, the settings page is read-only in an ordinary remote browser.
1.7 Desktop GUI#
The desktop GUI is currently a 0.1.0 preview release:
| Platform | Installer | Architecture |
|---|---|---|
| Windows | EXE installer | x64 |
| Linux | Debian package | amd64 |
| macOS 12+ | DMG installer | Apple Silicon (arm64) |
Windows: The installer bundles the Python runtime and the app source, so you don't need to prepare Python or the source repository separately.
Linux: Install, then launch:
sudo apt install ./hhtools-0.1.0-amd64.deb
hhtools-desktop
macOS: Drag Human-Humanoid Tools into Applications, launch it, and follow the first-launch page to finish setup (an internet connection is required; you don't need to preinstall Python or Homebrew). The preview has not been notarized by Apple yet. If macOS blocks it, choose "Open Anyway" in System Settings → Privacy & Security.
The installers for all three platforms include 30 sample motions and 6 robots, but none of them include GVHMR or the SMPL-family weights.
Note The macOS version retargets on the CPU, and supports neither Intel Macs nor Video to Motion.
1.8 CLI#
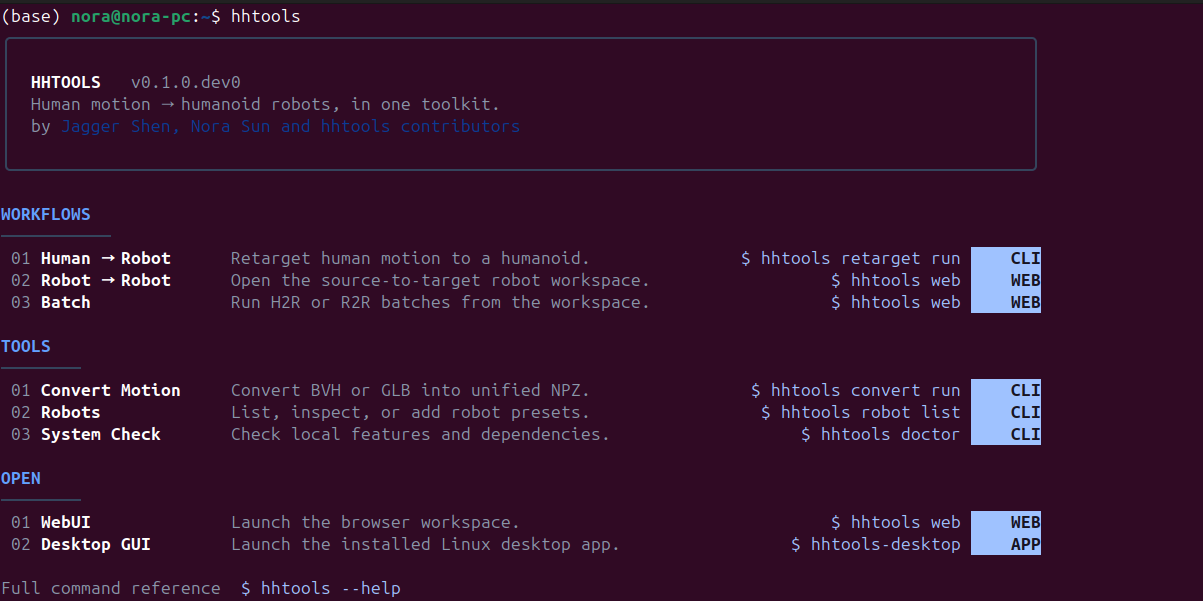
The command line uses the same core as the WebUI. When processing tens of thousands of clips, use the command line or the offline scripts instead of dragging files into the browser.
| Command | Purpose |
|---|---|
hhtools doctor |
Checks whether each component on this machine is ready |
hhtools convert run |
Converts BVH / GLB to the unified NPZ format |
hhtools import list / import run |
Lists dataset adapters; imports a dataset root as NPZ |
hhtools bodymodel check / setup |
Checks body model weight paths and shows download instructions |
hhtools robot list / info / schema / validate / scaffold / add |
Manages robot presets |
hhtools retarget run |
Newton IK retargeting; outputs CSV |
hhtools retarget interaction-mesh run |
Interaction-Mesh retargeting with objects or terrain; outputs CSV |
hhtools web |
Launches the WebUI |
hhtools agent ... |
Agent JSON interface (see Section 1.9) |
For the usage of each command, see uv run hhtools \<command> --help; examples are given in Sections 2–5.
1.9 Agent Interfaces: JSON CLI and MCP#
hhtools provides two interfaces for scripts and AI agents, both backed by the same versioned task contract:
| Interface | How it runs | Entry point |
|---|---|---|
| JSON CLI | Calls a running WebUI service and outputs exactly one strict JSON document per call | uv run hhtools agent ... |
| MCP | Standalone local stdio server; no WebUI needed | uv run --extra mcp hhtools-mcp |
Covered: human-to-robot retargeting (motion only, human–object interaction, terrain scenes), robot-to-robot retargeting without scenes, batch processing for both, and calibration assistance. Calibration assistance can generate calibration proposals, run deterministic validation, and output front and side preview images for vision-capable models to inspect.
Not covered yet: robot-to-robot retargeting with scenes, Video to Motion, Analysis, and real-robot deployment.
Install and check:
uv sync --locked --extra mcp
uv run hhtools doctor --require mcp
hhtools-mcp is a stdio server: it must be launched by an MCP client rather than run directly in a terminal. The repository ships a Codex project config (.codex/config.toml). After opening Codex in the trusted repository directory, use /mcp to confirm that hhtools is connected.
Recommended flow: query capabilities → register and inspect motions and robots → check calibration status (if missing, go through calibration proposal, validation, preview and save) → preflight in smoke mode to get an executable plan → start the job and wait → review the evaluation results and manifest → once everything looks right, run a full preflight again, and run the full job only with the user's explicit consent.
Note
A job being "complete" does not mean the motion quality is acceptable. Final quality and full runs must be confirmed by a human.
A save directory can be used by only one running instance at a time. Do not let the MCP server and the WebUI use the same directory at the same time; to switch, disconnect one before opening the other.
See Agent interfaces in the repository for full details.
2. Human to Robot#
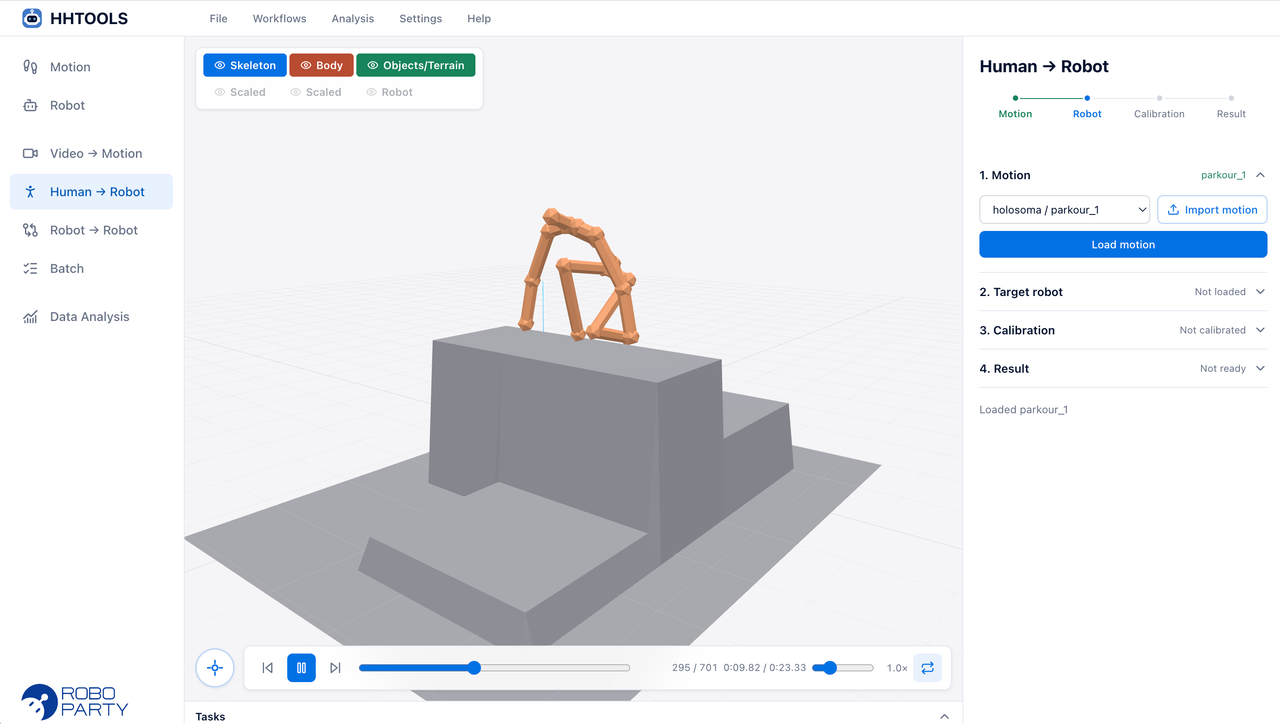
This section retargets a human motion clip to a target robot. In the WebUI, open Workflows → Human → Robot and complete four steps: Motion → Target robot → Calibration → Result.
2.1 Prepare the Motion#
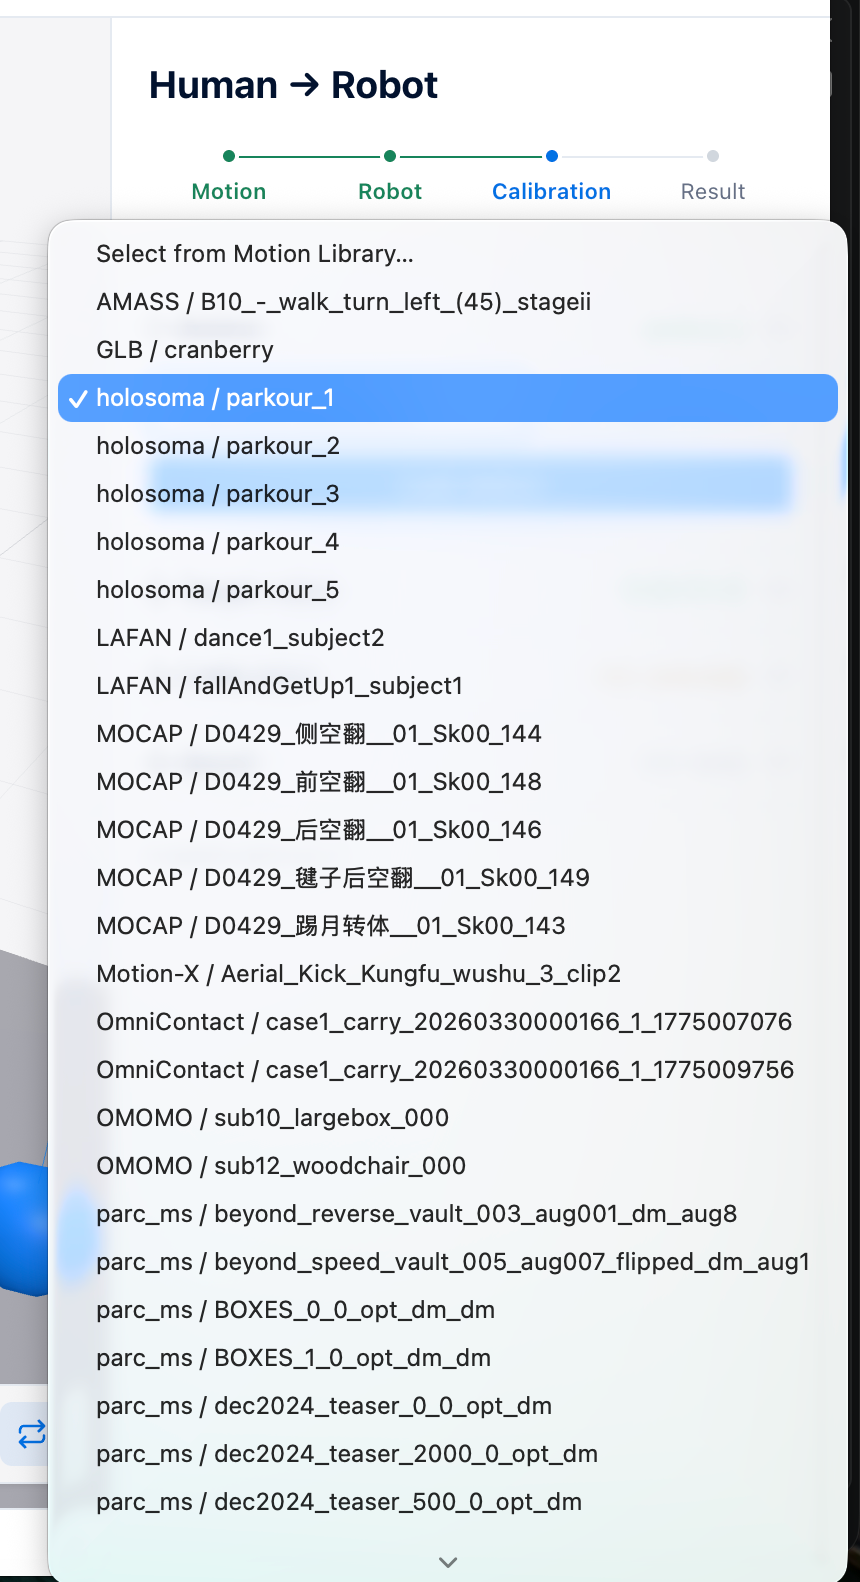
hhtools automatically recognizes motions from the following sources and converts them into its internal Motion format:
| Type | Description | Supported data (examples) |
|---|---|---|
| Motion (mimic) | Human skeleton only | BVH, GLB / GLTF, SMPL-family parameters; AMASS, LAFAN1, 100STYLE, Motion-X, PHUMA, SOMA, GVHMR results |
| Object interaction (intermimic) | Human + interacting objects | OMOMO, OmniContact-Dataset |
| Terrain scene (meshmimic) | Human + terrain heightfield | holosoma, PARC MS |
Manage the motion library under Assets → Motion:
Built-in motions: The repository ships 30 sample motions covering all three types above.
Import: Choose an import type (motion / object interaction / terrain scene), then select or drag in files or folders.
Scan a directory: The WebUI recursively scans the directory given by
--source; you can also change the library directory in Workspace Settings.
Note hhtools only provides format adapters and does not redistribute datasets. Download the full data from each dataset's official website and follow its license.
2.2 Choose the Target Robot#
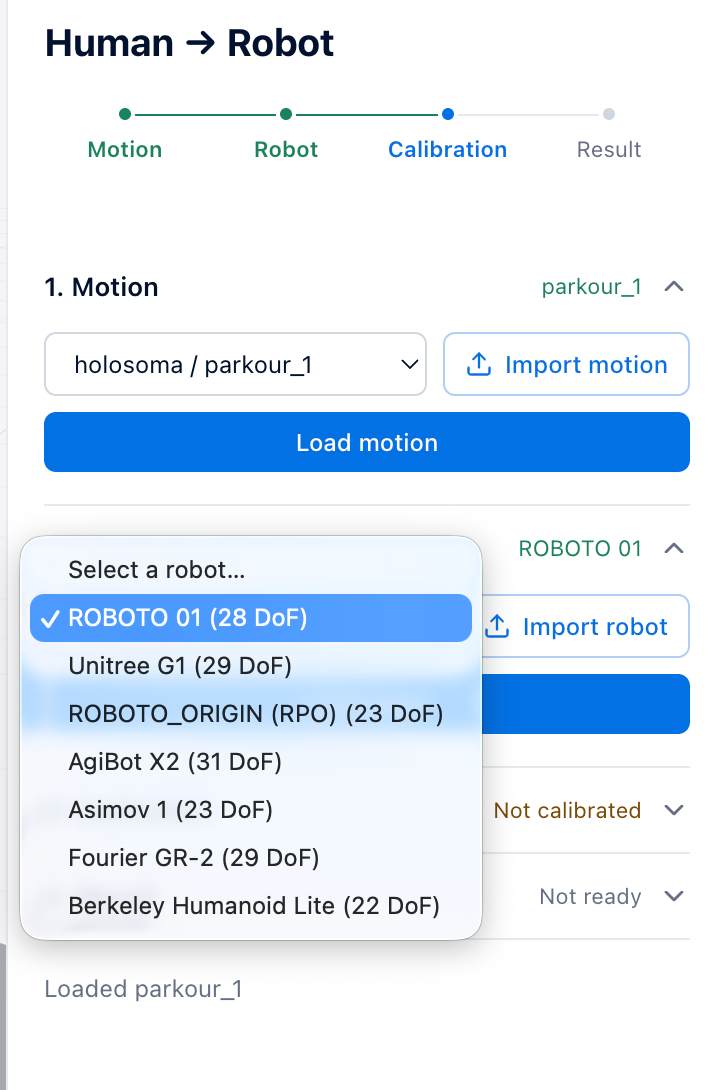
Manage the robot library under Assets → Robot. Besides the 6 built-in robots from Section 1.5, you can import any URDF humanoid robot:
Select the
.urdffile;Select the corresponding mesh folder;
hhtools automatically detects the joint structure and generates the config file
robot.yaml(includingik_map, the mapping from human joints to robot links), with no manual tuning needed.
Imported robots are saved in the user config directory (~/.config/hhtools/robots/\<name>/ on Linux) and can be removed from the library when no longer needed.
2.3 Calibration#
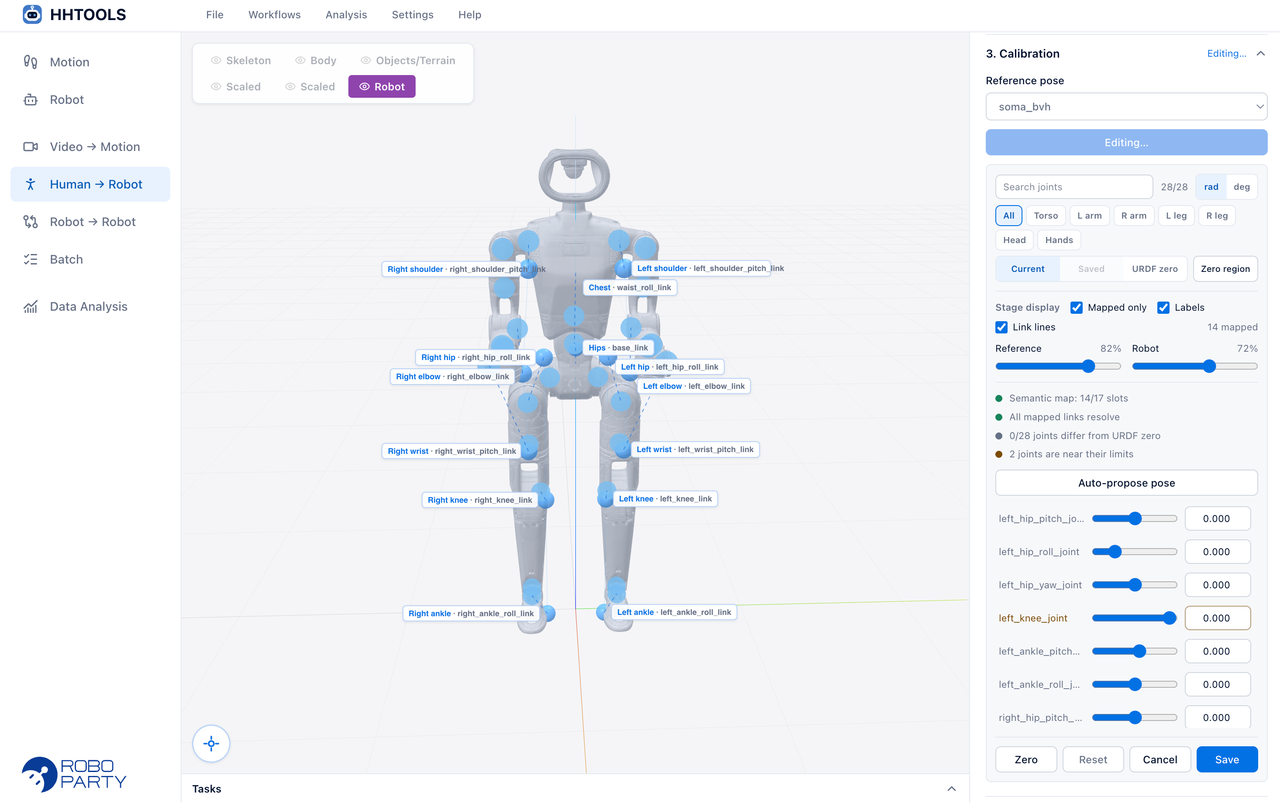
Humans and robots differ in height, proportions and zero pose. Calibration determines the scaling and correspondence between the two. Each robot needs to be calibrated only once per reference pose, and the calibration is reused for all motions of the same kind afterward.
Reference poses are distinguished by motion source, for example SMPL, SMPL-X, GVHMR, LAFAN BVH, SOMA BVH, mocap BVH, Xsens (100STYLE) and GLB. hhtools recommends one automatically based on the selected motion.
Calibration steps:
Select a reference pose and click Edit calibration;
Adjust the joint values until the robot pose aligns with the reference skeleton; or click Auto-propose pose to have hhtools generate a calibration proposal, which comes with a score and highlights the joints that still need adjustment;
Check that everything looks right, then save.
The calibration is saved next to the robot's URDF as retarget_calibration_\<reference pose>.yaml.
2.4 Choose a Solver and Retarget#
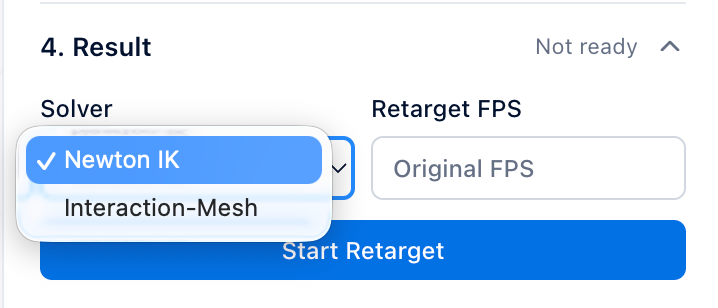
hhtools has two solvers. The WebUI recommends one automatically depending on whether the motion includes objects or terrain, and you can also switch manually:
| Newton IK | Interaction-Mesh | |
|---|---|---|
| Best for | Motion only (dancing, walking, flips, etc.) | Human–object interaction, terrain parkour |
| How it works | Tracks the positions and orientations of human joints, solves inverse kinematics in parallel on the GPU, and handles foot grounding and joint limits | Builds an interaction mesh from human joints and points sampled on objects and terrain, preserves their relative relationships, and keeps the hands and feet from penetrating objects and the ground |
| Speed | Very fast (GPU-accelerated) | Slower (per-frame optimization) |
Set Retarget FPS, then click Start Retarget. The first run for a given robot takes longer to load.
2.5 Review the Result#
When retargeting finishes, switch between the Source, Target, Result and Overlay views on the stage to compare the human motion with the robot motion.
Result diagnostics reports the following metrics and rates them as Stable / Review / Large deviation:
| Metric | Meaning |
|---|---|
| Mean error, P95 error | Position error between the robot links and the IK targets (scaled human keypoints) |
| Per-frame position error | Mean and max error curves for every frame, to help locate problem segments |
| Contact agreement | Whether the robot's foot contacts match the human's (estimated from foot height and horizontal velocity) |
| Foot slide | Horizontal foot sliding during contact |
Note Result diagnostics are only for spotting tracking and contact anomalies. Validate the final motion in simulation before using it on a real robot.
2.6 Export#
| Option | Description |
|---|---|
| Format | CSV or PKL |
| Export FPS | Resamples the finished trajectory without re-running IK |
| Start / End (s) | Exports only a segment |
| CSV comments and column headers | Optional |
The CSV columns are, in order: time, root position (x, y, z), root quaternion (qx, qy, qz, qw), and the joint angles dof_\<joint name>.
Results with objects or terrain are packaged as a ZIP containing the robot trajectory, each object's trajectory, and the object and terrain meshes, all converted to the robot's scale and coordinate frame.
2.7 Tune robot.yaml#
If the retargeting result is unsatisfactory, edit the robot's robot.yaml. Built-in robots are in configs/robots/\<name>/, and imported robots are in ~/.config/hhtools/robots/\<name>/. Changes take effect on the next retarget, without restarting the WebUI.
| Field | Purpose |
|---|---|
ik_map |
Correspondence from human joints to robot links. 3-DoF hips and shoulders should map to the middle link (usually \*_roll_link) |
weights |
Position and orientation tracking weights in IK |
smooth_joint_filter_masks |
Regularization strength that pulls joints toward the middle of their limits; has a large effect on the pose |
retarget.joint_scale_multipliers |
Manually fine-tunes the scaling of each joint, without recalibrating |
retarget.feet_stabilizer / apply_feet_stabilizer |
Foot grounding correction; turning it off is recommended for tumbling motions |
Tip If the human's arms are already hanging down but the robot still holds its arms out, first lower the value of
\*_shoulder_roll_linkinsmooth_joint_filter_masksto 0.1–0.3, rather than only raisingweights.
Note Re-uploading the URDF regenerates
robot.yaml, which may overwrite a manually editedik_mapand weights; calibration files are kept.
See configs/robots/_template/robot.yaml in the repository for the full template, and framework.md for the underlying principles.
2.8 Retarget from the Command Line#
# Format conversion and dataset import
uv run hhtools convert run assets/motions/mimic/LAFAN/dance1_subject2.bvh -o /tmp/npz --unit m
uv run hhtools import run --dataset lafan \
  --root assets/motions/mimic/LAFAN -o /tmp/lafan_npz --sequence dance1_subject2.bvh

# Newton IK (motion only); --limit-frames is for quick trial runs
uv run hhtools retarget run path/to/clip.npz \
  --robot <robot name> -o /tmp/out.csv \
  --calibration-reference smpl --limit-frames 30

# Interaction-Mesh (object interaction / terrain)
uv run hhtools retarget interaction-mesh run path/to/clip.pkl \
  --robot <robot name> -o /tmp/out_im.csv \
  --calibration-reference smpl --limit-frames 30
Use uv run hhtools robot list to see the available values of \<robot name>. Before retargeting from the command line, complete calibration in the WebUI, or prepare the matching calibration file next to the URDF.
3. Robot to Robot#
This section transfers existing motion from one robot to another. It is useful when you only have motion data for one robot (for example, a dataset already retargeted to RP1) and want to use it on a different robot. In the WebUI, open Workflows → Robot → Robot and complete five steps.
3.1 How It Works#
hhtools treats the source robot as if it were a human:
It runs forward kinematics on every frame with the source robot's URDF to get the spatial positions and orientations of the key joints;
It arranges them into a standard skeleton according to the
ik_mapin the source robot'srobot.yaml, which is equivalent to a human motion clip;It calibrates the target robot, using the source robot's zero pose as the reference;
It solves the target robot's joint trajectory with Newton IK.
3.2 Prepare the Source Trajectories#
| Source | Description |
|---|---|
| Trajectories exported by hhtools | CSV, PKL or NPZ, with or without a comment header |
| Dataset folders | Import a whole folder; clips are scanned individually |
| Trajectories with scenes | Results with objects or terrain exported from Motion to Robot; the scene is scaled together according to the proportions of the two robots |
| MotionDecode | Motion data released by ChingMu (CSV, 120 Hz) |
Note If the source file has no time column or sample rate (for example, MotionDecode), you must set Source trajectory FPS manually. Set it to 120 for MotionDecode; processing it at the default 50 Hz makes playback and retargeting run at the wrong speed.
3.3 Use the WebUI#
The steps here are similar to Human -> Robot; follow Section 2.
Source robot: Select and load the robot the trajectory originally belongs to.
Source trajectory: Load from the robot trajectory library, or upload files or folders; set Source trajectory FPS as needed.
Target robot: Select and load the robot to transfer the motion to.
Calibration: Calibrate this pair of robots once; after you save, the calibration is reused automatically. Calibrations are saved per "source robot + target robot" pair, so a different pair needs its own calibration.
Result: Set Retarget FPS and start retargeting. Review and export the result the same way as in Sections 2.5 and 2.6.
3.4 Transfer from the Command Line#
# Transfer an entire export directory from the source robot to the target robot
python scripts/batch_r2r_retarget.py \
  --source-robot <source robot> --target-robot <target robot> \
  --in /path/to/source_exports --out /path/to/target_exports \
  --profile auto --skip-existing

# MotionDecode (G1, 120 Hz)
python scripts/batch_r2r_retarget.py \
  --source-robot g1 --target-robot <target robot> \
  --in /path/to/MotionDecode/samples --out /path/to/MotionDecode_out \
  --source-fps 120 --skip-existing
Before transferring from the command line, complete the calibration for this robot pair in the WebUI, or specify a calibration file with --calibration.
4. Video to Motion#
This section estimates human motion from a monocular video. The generated motion is saved to the motion library automatically, and can then be retargeted to a robot as described in Section 2. hhtools runs inference with the officially released weights of GVHMR.
4.1 Prepare the GVHMR Runtime#
hhtools does not bundle GVHMR's source code, weights or Python environment. Install it separately by following the official GVHMR instructions.
Linux: hhtools calls your installed GVHMR environment in a separate subprocess. Set the paths before launching the WebUI:
export HHTOOLS_GVHMR_ROOT=/path/to/GVHMR
export HHTOOLS_GVHMR_PYTHON=/path/to/gvhmr/environment/bin/python
uv run hhtools web
Requirements:
The GVHMR directory keeps the official
inputs/checkpointsstructure, including the licensedinputs/checkpoints/body_models/smplx/SMPLX_NEUTRAL.npz;The selected Python environment has GVHMR's dependencies and CUDA;
ffmpegis onPATH.
If no paths are set, hhtools tries ~/GVHMR, a virtual environment in the repository, and a Conda environment named gvhmr, but setting them explicitly is the most reliable. Inference times out after two hours by default; adjust this with HHTOOLS_GVHMR_TIMEOUT_SECONDS.
Windows: GVHMR runs as an optional Docker component. Point HHTOOLS_GVHMR_ROOT to the official source directory and HHTOOLS_GVHMR_IMAGE to a prepared image; if the body models are stored separately, mount them with HHTOOLS_GVHMR_BODY_MODELS.
Desktop GUI: You can configure or repair GVHMR under "Optional components" in Workspace Settings.
Note macOS does not support Video to Motion.
4.2 Use the WebUI#
Open Workflows → Video → Motion:
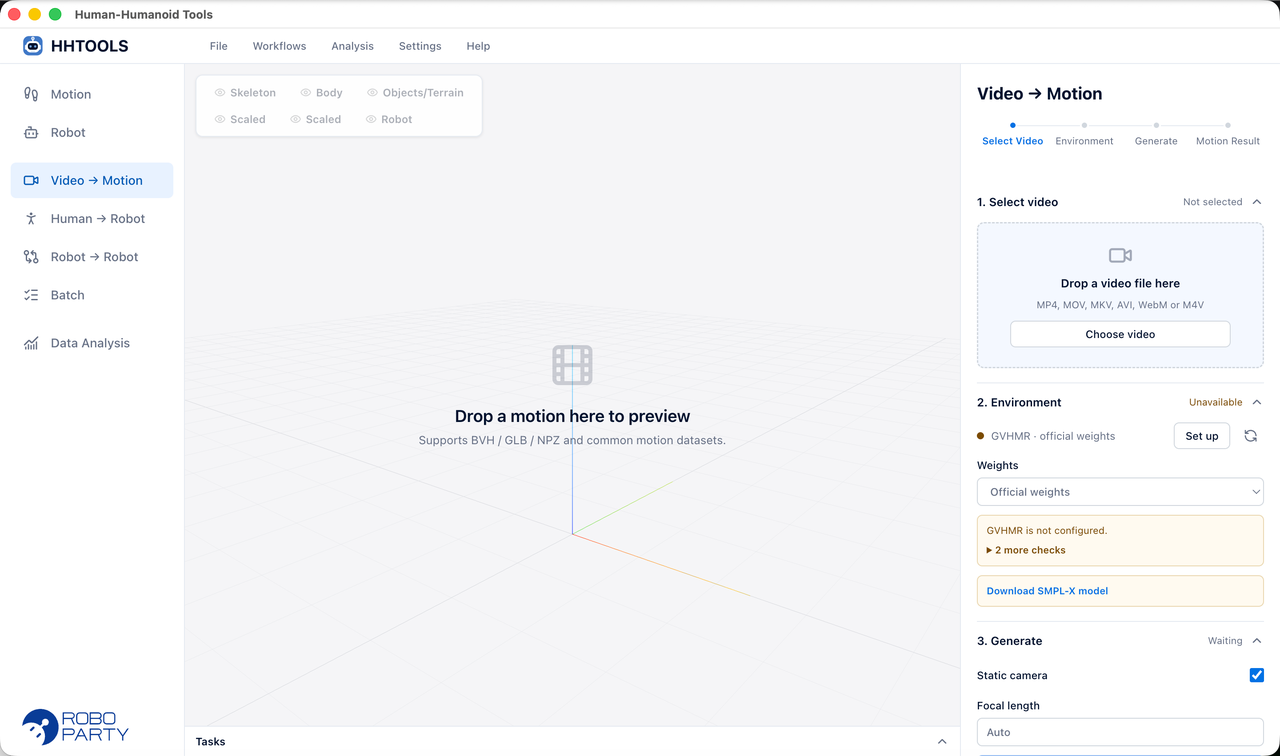
Select video: MP4, MOV, MKV, AVI, WebM and M4V are supported.
Environment: Confirm that GVHMR and the official weights show as "Ready". If they are not ready, the page lists what is missing.
Generate: Choose whether to enable Static camera depending on how the video was shot, set the focal length to auto or enter it manually, then click Start GVHMR.
Motion result: Shows the frame count, duration and frame rate. The generated motion is already registered in the motion library.
4.3 Import Existing GVHMR Results#
Results you have already produced with GVHMR (hmr4d_results.pt) can be imported directly under Assets → Motion, or converted from the command line:
uv run hhtools import run --dataset gvhmr --root /path/to/gvhmr/output --out /path/to/motionsThe conversion requires licensed SMPL-family body models on your machine (see Section 1.5).
Note Video to Motion only uses GVHMR's officially released weights, and does not support custom weights or training.
5. Batch#
This section processes many motion clips at once. Tens to hundreds of clips can be handled in the WebUI under Workflows → Batch; for whole datasets (tens of thousands of clips), use the offline scripts.
Note Before batch processing, complete the relevant calibration in Motion to Robot or Robot to Robot. Batch processing does not open the calibration interface.
5.1 Batch in the WebUI#
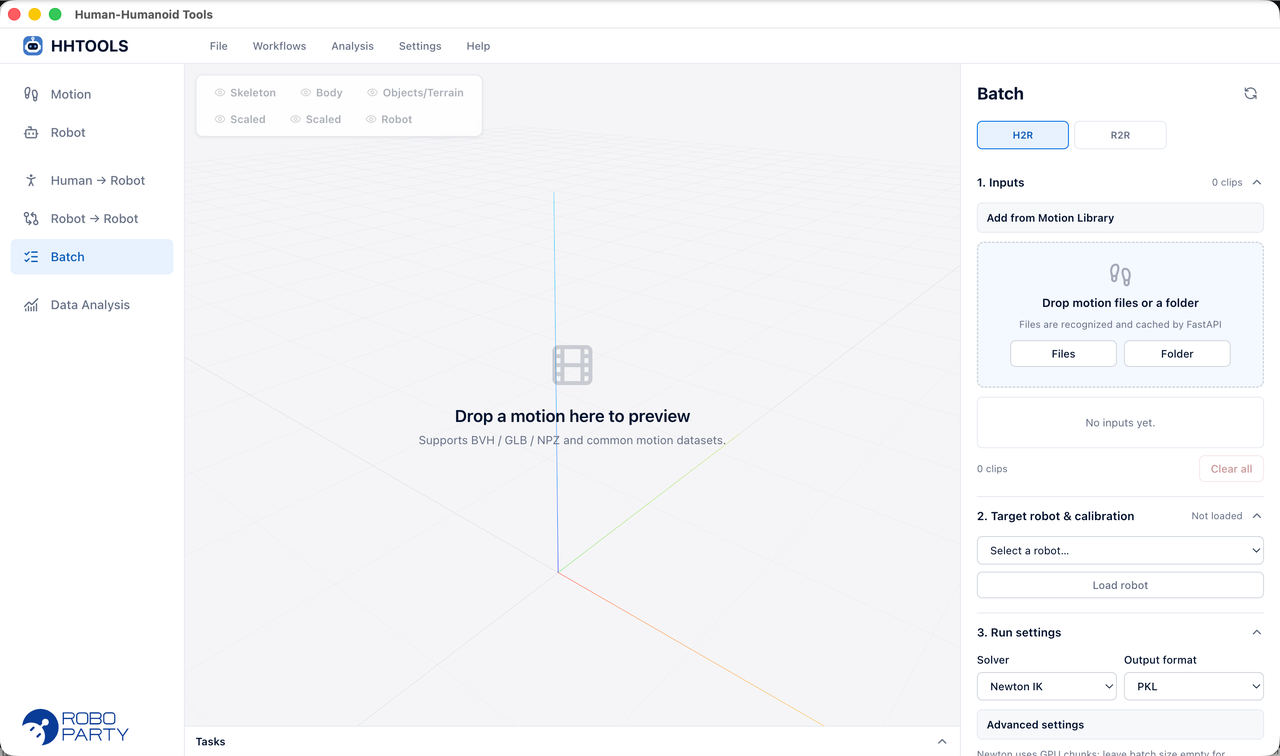
The Batch page supports three kinds of jobs:
Human → Robot batch
Input: Drag in motion files or folders, or add them from the motion library; duplicates are skipped automatically.
Target robot & calibration: Load the target robot. The page groups the input motions by reference pose and checks whether each group is calibrated.
Run settings:
Setting Description Solver Newton IK runs in parallel chunks on the GPU; Interaction-Mesh processes clips one at a time GPU batch size Number of motions per Newton IK chunk (1–256); tuned automatically if left blank Source FPS / Retarget FPS / Export FPS Export FPS follows Retarget FPS by default Start / End time Processes only a segment of each clip Output format CSV or PKL, with an optional CSV header Result name Name of the downloaded ZIP Click Start H2R batch. The page shows overall and current progress; when the job finishes, it lists failed items with their reasons, and you can download the ZIP.
Robot → Robot batch
Drag in source trajectories (CSV, PKL, NPZ or dataset folders), load the source and target robots, set the frame rates, then click Start R2R batch. This robot pair must first be calibrated in Robot → Robot.
Video → Motion batch
Drag in multiple videos or folders, confirm the GVHMR runtime, set the static camera option and focal length, then click Start V2M batch. Videos are processed one by one in a queue, and the generated motions are saved to the motion library. For items that fail midway, click Retry unfinished.
5.2 Process Whole Datasets with Offline Scripts#
The offline scripts are designed for large-scale data. They support resuming after an interruption, process each clip in its own subprocess, and export the same content as the WebUI.
# Motion only (Newton IK): amass | lafan | xsens_mocap (100STYLE) | glb | …
python scripts/batch_mimic_retarget.py \
  --robot <robot name> --dataset amass \
  --in /path/to/AMASS --out /path/to/AMASS_out \
  --skip-existing --limit 5

# Human–object interaction (Interaction-Mesh): omomo | omnicontact
python scripts/batch_intermimic_retarget.py \
  --robot <robot name> --dataset omomo \
  --in /path/to/OMOMO --out /path/to/OMOMO_out \
  --skip-existing

# Terrain (Interaction-Mesh): parc_ms | holosoma
python scripts/batch_meshmimic_retarget.py \
  --robot <robot name> --dataset parc_ms \
  --in /path/to/parc_ms --out /path/to/parc_ms_out \
  --skip-existing --failure-log failures.jsonl

# Robot → Robot: see batch_r2r_retarget.py in Section 3.4
Common options:
| Option | Purpose |
|---|---|
--skip-existing |
Skips existing outputs, for resuming after an interruption |
--limit |
Processes only the first few clips, for trial runs |
--failure-log |
Logs failed clips to a file |
--t-start / --t-end |
Exports only a segment of each clip (in seconds) |
Output layout: motion-only clips are written to \<out>/…/\<name>.csv; clips with scenes are written to \<out>/\<name>/\<name>.csv, alongside the object or terrain files in the robot's coordinate frame.
Tip If Newton IK batch solving fails, it automatically falls back to processing clips one at a time. For tumbling motions, turn off foot grounding correction (see Section 2.7).
5.3 Background Job Scheduling#
Background jobs in the WebUI have no concurrency limit by default. On a shared server, or when GPU memory is tight, you can enable first-in, first-out queuing:
uv run hhtools web --max-running-jobs 1 --max-queued-jobs 32| Option | Environment variable | Description |
|---|---|---|
--max-running-jobs |
HHTOOLS_MAX_RUNNING_JOBS |
Number of jobs running at the same time; 0 means unlimited |
--max-queued-jobs |
HHTOOLS_MAX_QUEUED_JOBS |
Queue limit; 0 means unlimited; only takes effect when the running limit is positive |
--max-batch-items |
HHTOOLS_MAX_BATCH_ITEMS |
Item limit for Agent batch jobs; 0 means unlimited |
--max-batch-total-frames |
HHTOOLS_MAX_BATCH_TOTAL_FRAMES |
Total frame limit for Agent batch jobs; 0 means unlimited |
You can also change these under Workspace Settings → Background-job scheduling. Changes take effect as soon as you save, without interrupting running jobs. Command-line options and environment variables override the values saved in the UI on the next launch.
Note The concurrency limit applies only to queued web jobs. It does not cover the solver warm-up that may be triggered when you select a robot, so it is not a GPU concurrency limit for the whole process.
6. Analysis#
This section analyzes a motion dataset: it computes kinematic and physical quality metrics for each clip, assigns interpretable tags, clusters the clips in an embedding space, and recommends a training subset that is both diverse and challenging. In the WebUI, open Analysis → Data Analysis.
Analysis never deletes or moves any source files. Poor-quality motions are only tagged; whether to keep them is up to you.
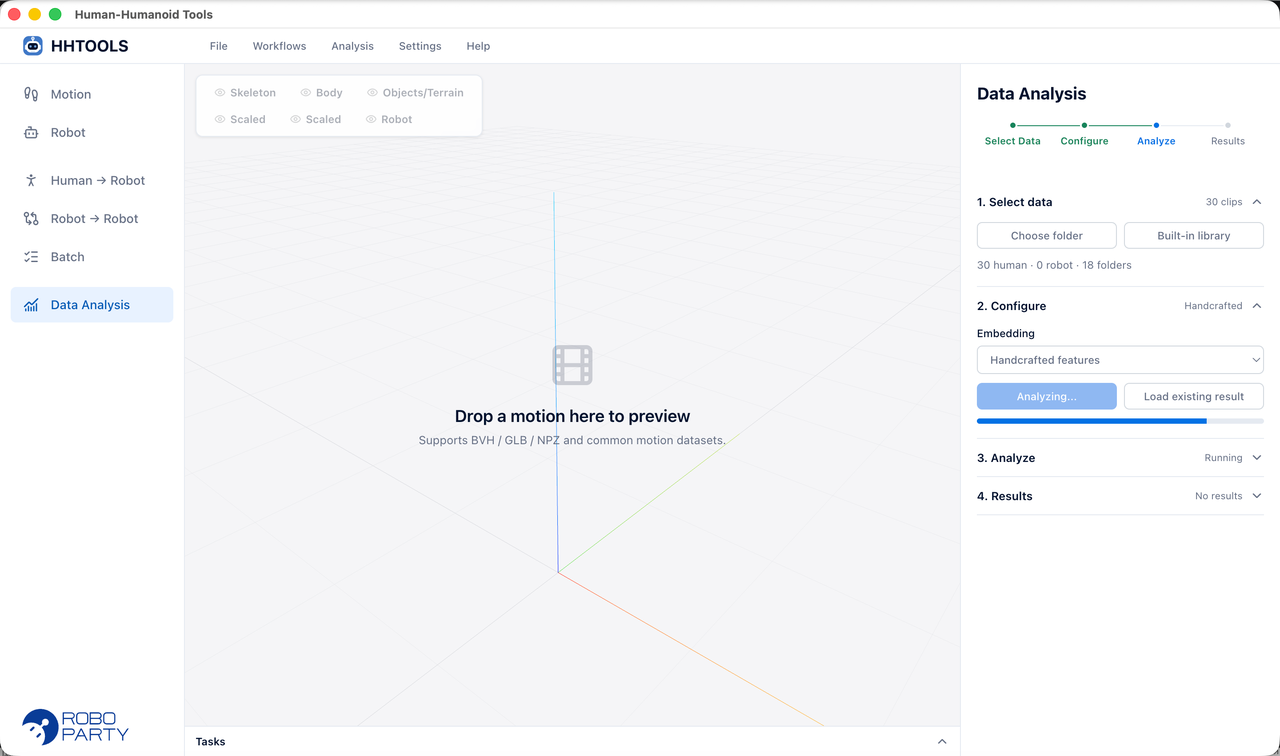
6.1 Analysis Workflow#
Select data: Choose dataset folders (you can add several to the upload basket), or use the built-in library. Human motions and retargeted robot trajectories can sit in the same directory and be analyzed together.
Configure: Choose an embedding method. Hand-crafted features are currently used; PAE is a reserved option.
Analyze: Click Start analysis to compute dynamics, quality, tags, embeddings and clusters. Analyzed data is cached, so next time you can click Load existing result directly; the cache is invalidated automatically when the inputs, scene files or configuration change.
Results: Explore the data with histograms, scatter plots and filters, then recommend and export a subset.
6.2 Metrics and Tags#
Physical quality S_phy. Points are deducted from 100 for six kinds of problems:
S_phy = 100 − Σ (weight × severity)| Problem | Deduction weight |
|---|---|
| Floating (fraction of frames with both feet off the ground) | 45 |
| Velocity violation (fraction of frames in which joint velocity exceeds the limit) | 22 |
| Ground penetration | 15 |
| Foot sliding | 8 |
| Self-collision | 5 |
| Jitter | 5 |
A score of 90 or above is tagged quality_ok, 70–90 is quality_warn (manual review recommended), and below 70 is quality_bad. For motions with terrain, floating, penetration and sliding are computed against the local terrain height.
Dynamic level. Motion complexity is computed from joint velocities and accelerations, then split into five levels by library-wide quantiles: static, low_dynamic, mid_dynamic, high_dynamic and burst.
Behavior tags:
| Tag | Meaning |
|---|---|
in_place / locomotion |
Moving in place (root horizontal speed below 0.15 m/s) / traveling |
turning |
Turning or rotating in place |
leg_static |
Leg kinetic energy is in the lowest 15% of the library; the legs barely move |
jump / flip |
Jumping / flipping |
has_object / interaction |
Has an interacting object / the hand–object distance is below 0.2 m in more than 10% of frames |
has_terrain / parkour |
Has terrain / the terrain height difference exceeds 0.2 m |
There are also scalar metrics such as root speed, turning rate, airborne ratio, step frequency, leg and arm energy, maximum torso tilt and terrain roughness, which you can inspect one by one in the interface.
6.3 Explore the Data#
Metric histogram: See how any metric is distributed across the library, and brush-select a range to filter the matching clips, for example all motions whose horizontal speed falls within a certain range.
Filters: Filter by tag, source (human / robot) and folder.
Embedding scatter plot: Each point is a motion clip; the closer two points are, the more similar their behavior, and colors indicate clusters. The embedding standardizes 15 hand-crafted features and reduces them to 2D (with UMAP if it is installed, otherwise PCA). Clustering uses HDBSCAN when available, otherwise KMeans.
Preview: Click any clip to play it on the stage; robot trajectories are matched to their robot automatically.
6.4 Recommend a Training Subset#
Recommended subset picks, from the currently filtered clips, a set of motions that is both diverse and weighted toward difficulty:
score = α × distance to already-selected clips + (1 − α) × complexityAt each step, the clip with the highest score is selected, until the target ratio is reached. The default ratio is 10% and α defaults to 0.99; the smaller α is, the more the selection favors complex motions. The recommendation only highlights clips without removing any others, and you can add or remove clips manually on top of it.
6.5 Export#
Selected clips can be exported as a JSON or CSV manifest; robot trajectories can also be exported with Export robot ZIP.
6.6 Tune the Analysis Configuration#
The analysis thresholds and weights are in configs/analysis/default.yaml, including the height thresholds for floating and contact, the foot-slide speed threshold, the quality deduction weights, the α and default ratio for subset recommendation, and the number of parallel processes.
Note Analysis is currently available only in the WebUI; the command line and Agent interfaces do not support it yet.